Landscape photography tips ideas
Landscape photography tips ideas concepts techniques
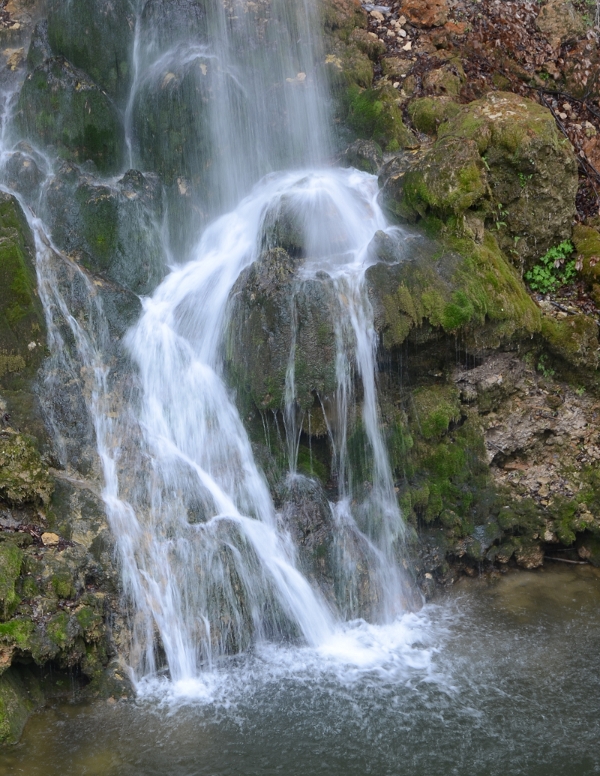
To blur the water longer shutter speeds (several seconds), small aperture(f/11-f/22) most cases tripod and some times ND filters(grey filters to reduce light level to allow longer shutter speeds) is needed if the light level is too high.
Landscape photography tips
I intend to update this article time to time to give you more tips. I also intend soon to write about filters, and many other details in landscape photography.
Landscape photography tips
To make beautiful landscapes is cool. I like nice landscapes. See the landscape photography tips, ideas and concepts below.
[do_widget Text]
1. Find interesting places and exact locations

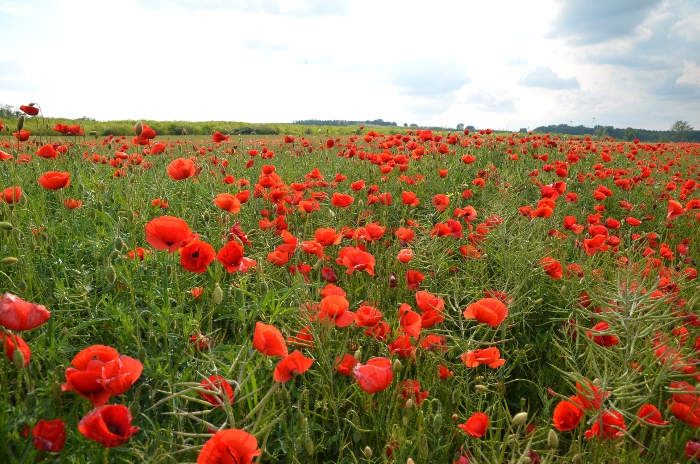
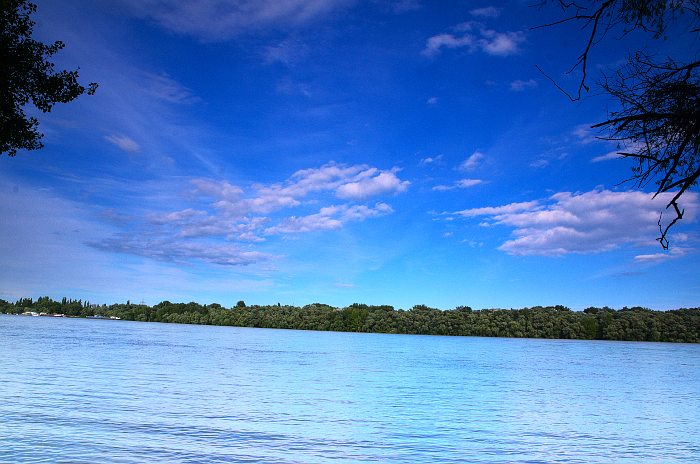
Perhaps this is the most important thing to consider. You cannot make a stunning photo on nothing. So carefully select the best locations. In Europe places like Greece, Italy, Croatia, Austria, Slovenia, Switzerland, Iceland, Slovakia, UK, France seems best for dramatic landscapes. For example we were in Sithonia peninsula in Greece, and I almost cannot stop shooting, so beautiful everything there. But on the other hand you don’t need the fanciest places in Far-east, or South America to make something special. If you check landcapes almost there is a water on 80% of them, so think about water on the picture, like lakes, river, streams, sea or ocean. Nice hills are also the things to look for. Clouds are the other very nice things in landscapes, so check when there are interesting colours or shapes in the sky. Good map with height lines comes handy to find the best locations around hills for example. A compass is also helpful to determine the sun directions in different locations. It is interesting the photo above with red flowers. The photo was made with the Nikon d7000 camera. Not looks like at all as it is in the reality. In strong light the red color blown out because of overexposure, and because I used vivid jpg setting. Would be better to shoot in Raw, where there are more dynamic range is possible.
2. Composition – Landscape photography
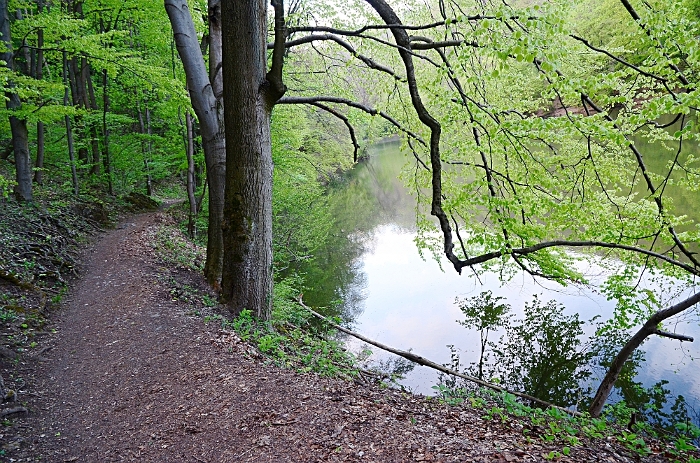
Imagine how the picture you take must look like. The most detail you can get from the foreground, so it is very important. If there is some dominant element in the picture also can help. For huge depth of field small apertures f/8-f/22 preferred. Sometimes I use telephoto lenses to have a compressed and shallow depth of field effect. Some pictures are just great with telephoto lenses. I little over-sharpened the above photo. Many pics available in the internet doesn’t look like at all like it comes out of the camera or how it looks in reality. This is just like this. On the other hand digital cameras up to date cannot capture the dynamic range what we see in reality. Don’t put important element in the middle. The rule of thirds is a good guideline: try to put important elements in the third of the image frame. Same way don’t put the horizont in the middle of the picture: it is just very boring. Experiment with it a little how is it looking up or down perhaps at thirds height or other places depend on what is on the picture. You can also try to bend a picture a bit: how is it looking better or worse?
3. Where to focus? – Landscape photography
It is an important point here. If you focus automatically with the camera, the camera focuses in the distant far point. However the most visible part of your image is the foreground. If you want the foreground appear sharp must focus a little closer. If you focus too close and the aperture is not narrow enough or your lens is not wide enough, most part of your image (back part) will be out of focus. There are ideas of focusing half or third part of your image, but really experimenting the best way to figure out which is a good focus point for your image. It is also depend how you place your camera, portrait or normal setting, and how long is the distance between the beginning and end of the scene. With longer telehoto lenses which is also very useful because you can have more control of the depth of field it is not like this, here the dof is quite shallow.
4. Light conditions
Light has the absolute dominant role in photography. Try to study the light very thoroughly in order to get the best out of it for your photos.
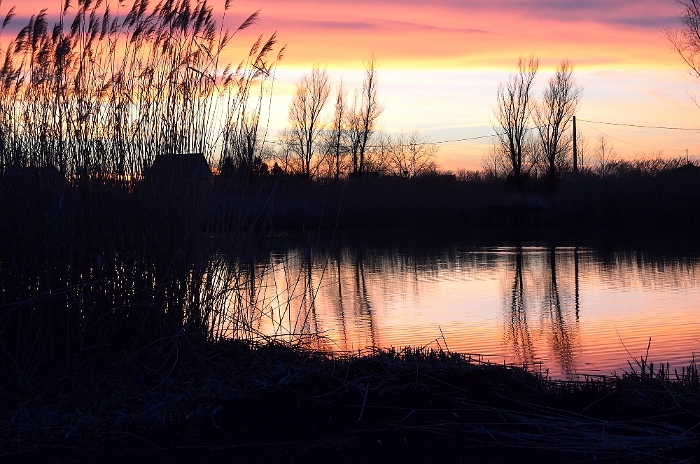
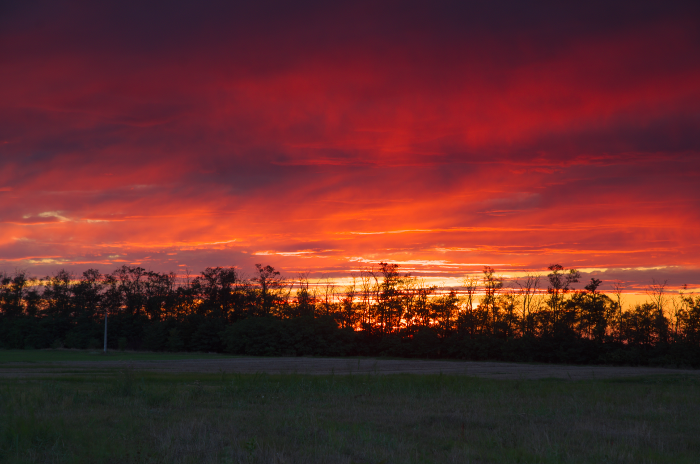
As in nature and wildlife photography the dawn and dusk hours perhaps one of the most interesting for landscapes as well, when the light is parallel to the ground. Filters can help to remove highlights, but nice lights and how you capture them makes the picture special. Try to capture feelings with the picture.
6. Exposure bracketing

Exposure bracketing only means you make more photo with different darkness/lightness. Most cameras has bracketing function where we set how many pictures we want to make(usually 2 or 3), with how many difference in EV. The smallest difference is 1/3 EV. We can set to 1/3 Ev to even 2EV in certain cameras. If our camera does not have HDR function we can blend a HDR image afterwards from the different exposures. If your camera doesn’t have a bracketing option it is not a problem, you can make several pictures with different apertures using the exposure compensation function. Half black half white square with +- signs in it. There are cameras where you need to push to buttons at same time to change it. You make a picture at -1,0+1 exposure and you can blend the pictures together afterwards.
7. Shoot in raw instead of jpg
In raw you have much better quality, more colours, more dynamic range to play with. There are many Raw converters out there, including free ones which makes the job quickly and easily. I usually set my camera to make a jpg+Raw files as well, if I don’t like the jpg, through out the Raw file as well. I only keep the best ones in Raw format, as they are quite huge usually. From Raw I save the pics if I want high quality in 16 bit png, or Tiff format instead of the compressed jpg format. Jpg format is good when small size is preferred over very high quality.
8. Depth of field, aperture
For dramatic landscapes huge depth of field is necessary. Most landscape pictures made with small apertures like f/11-f/22. At smallest apertures sharpness decreases significantly(especially from f/22) because of diffraction. DOF table can help, but my experience you cannot simply follow because sharp zone is another thing.
Aperture: f/8 Focal length 24mm Full frame
| Focusing distance | In focus in front | In focus behind |
|---|---|---|
| 5m | 1,68m | Infinity |
| 10m | 1,94m | Infinity |
| 15m | 2,07m | Infinity |
| 20m | 2,15m | Infinity |
| 50m | 2,29m | Infinity |
| 100m | 2,34m | Infinity |
| 500m | 2,39m | Infinity |
| 1000m | 2,42m | Infinity |
Aperture: f/11 Focal length 24mm Full frame
| Focusing distance | In focus in front | In focus behind |
|---|---|---|
| 5m | 1,27m | Infinity |
| 10m | 1,45m | Infinity |
| 15m | 1,53m | Infinity |
| 20m | 1,57m | Infinity |
| 50m | 1,64m | Infinity |
| 100m | 1,67m | Infinity |
| 500m | 1,69 | Infinity |
| 1000m | 1,72m | Infinity |
Aperture: f/16 Focal length 24mm Full frame
| Focusing distance | In focus in front | In focus behind |
|---|---|---|
| 5m | 0,97m | Infinity |
| 10m | 1,07m | Infinity |
| 15m | 1,11m | Infinity |
| 20m | 1,13m | Infinity |
| 50m | 1,17m | Infinity |
| 100m | 1,19m | Infinity |
| 500m | 1,2m | Infinity |
| 1000m | 1,2m | Infinity |
7. ISO sensitivity settings
Keep the ISO the lowest setting, for best picture quality and best dynamic range, when is it possible. Dynamic range drops if you increase ISO. If nothing moves on the picture, why to use the ugly noisy, lower quality high iso ?
On some cameras the lowest iso is not a natural setting (ISO 50 for example). This case you can use the lower setting, but image quality is not better. If you don’t have a tripod and higher ISO is needed, you can use that instead of the blurred picture. The low ISO setting is good if you want longer exposure to blur the water for example.
9. Try not include distracting elements
Unfortunately electric poles, wires, dropped garbage or other elements can ruin a landscape easily. Try to find these in advance before making the shot and not include them in the photo. To make the shot you want and realize the distracting element at home is frustrating.
10. Get a tripod
Tripod is essential unless if you are not Ken Rockwell, who uses stabilized kit lenses instead:). Why is the tripod essential? At f/11-f/16 which is often used lots of light needed to make a sharp photo. In dark situation you need high iso for that which you don’t want. The cheapest really good, stable tripods are the Manfrotto 055 XProB and the Induro At 313 according to my opinion. Both of them is from aluminium material. These are stable tripods, if you think a lower range is also stable enough there are smaller models as well. (Induro At213 or Manfrotto 190 Xprob namely). I prefer to be more stable, but these are more heavy as well. For the tripod heads cheapest ball heads (or almost the cheapest) does the job if you are on the budget. If you want to record lots of videos you need a pan head, which has more smooth transitions. There are very precise panoramic or 3D heads are also available for more advanced users. Most tripod has the same screw, so normally you can attach any tripod head on any tripod leg which has the same thread.
11. Filters
All serious landscape photographer uses filters. Circular polarizer, Grad and ND filters are the most popular. Some cheaper and sometime more expensive filters as well can add color cast or vignetting to the photo. Filters on the other hand degrade image quality, cheap filters degrade image quality more, than expensive filters. Good filters are really expensive, can be the same money as the lens itself.
The circular polarizer helps to enhance colours and reduce reflections on the surface of water and glass not for metal. These filters are not effective facing the sun or if the sun behind you. If we turn the polarizer the effect will be stronger or weaker. Linear polarizers are said to be not the best for digital slr cameras, my experience is they works without any problems. I would prefer B+W, Singh ray or Hoya not the cheap ones, which usually also works but leaves a color cast on the picture. If you want better quality B+W, or Heliopan the ones to buy. ND filters are grey filters to reduce light, enable longer shutter speeds in good light as well. This effect is especially useful for create dreamy water surface. Gradual filters (Manufacturers Lee(high end) and Cokin P(still nice) used to reduce light of the sky in order to make more natural looking images. This filters are usually half grey and half clear. The better ones are rectangular allowing to change position needed for the specific picture. They selling special holders for it, but if you don’t have the budget for the holder and the attachement piece just buy the filter, and you can hold with your hand under exposition. Some wide angle lenses doesn’t allows you to use filters like the legendary Nikon 14-24mm f/2.8 for example, but seems Lee constructing some kind of frame for it. It is possible to stack filters using more filters at same time-
If you want to read more about filters see here: Filters for landscape photography
On the other hand you can make very nice landscapes without the filters as well, if you make multiple exposition and blend the pictures together afterwards. Several cameras has bracketing function where you can choose how many frames you want with which exposure settings, like 1 stops, half stop, or 1/3 stops between the frames. If you have a budget usually filters are the better option, not needed to be in front of the computer for so much time.
12. Live view
Live view on newer cameras can be quite useful for framing landscapes.
13. Mirror lock up, remote shutter release
To avoid camera shake mirror lock up mode can be used. It is different how to use this at different cameras. Perhaps not all camera has this option. In my d7000 is MUP is the abbreviation to look for at the small bottom dial at the main dial. Must turn the dial there, after must press shutter button once (dark in the viewfinder), and when we make a photo second time. In Canon it is the menu, look for mirror lockup.
14. Equipment
With any Dslr camera today, with a good lens does the job. You can make excellent pictures with the kit lens, but unfortunately most kit lens has rotating front elements, which is not good for filters. Obviously the first candidates are Ultrawide angle and Wide angle lenses. The very wide angle lenses usually not good with filters unless they have a drop-in filter possibility more close to the lens mount.
Telephotos are also usable, but not so widely as wide angle lenses. I would prefer Nikon over Canon for landscapes because of the better dynamic range and more colours which gives you lot of extra latitude to work with. Nikon d810,d800/e, Nikon d7000 are the best for dynamic range. The Nikon d7100 is also very nice but diffraction limit is perhaps close with 24Mp sensor compare to the older 16Mp unit.
Cheapest decent options:
any Canon Dslr+18-55 is, or stm is (surprisingly good at wide end)
any Nikon Dslr+18-55 vr
Next step
Same Dslr+better lenses. For landscape lenses wide open performance is not very important, as you normally stop down the lens anyway.
Best value options (it is arguable what is best value):
Nikon d7000+16-85Vr or Tamron 17-50(non Vc)
Canon 20-70d+Tamron 17-50 (non Vc)
High end Full frame gear if money doesn’t matter:
-Nikon d810, or d800+Nikon 14-24 f/2.8G (probably the very best ultra wide lens, downside is no filters available, although I heard Lee fabricated something for this lens) or Nikon 24mm Tilt shift
-Canon 1D X+Canon 24-70 f2.8 MkII or Canon 24mm f/3.5 Tilt-shift (no distortion like at most UWA) or Tamron 24-70 Vc
15. Post processing
Post pocessing is essential. There are many softwares available today for post processing, like different Raw converters, Photoshop, Lightroom, Dxo, Gimp and many other programs. Many of this programs are free like the Gimp or Raw therapy for example. You can crop if you don’t like parts of the photo. You can adjust the light, exposure, sharpness, curves, contrast, colours and many other parameters as well. If you done your job well outside, perhaps not so much time needed for post processing. You can filter out colors, can turn to black and white, remove noise and makes lots of other things with the photo.