ISO – What does iso mean in photography ? ISO tricks and tips
ISO – What does iso mean ? ISO tricks and tips
Usual settings in different kind of photography
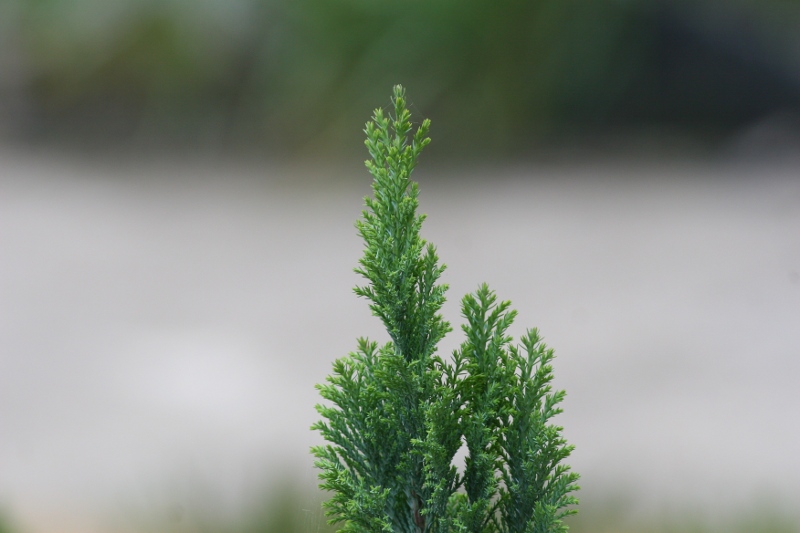
Landscape
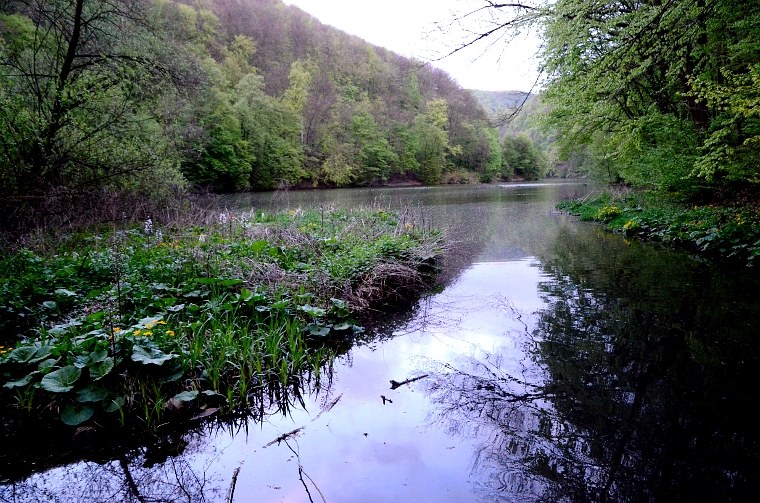
 iso 100 1/15s f/8 here I use the stabilizer, longer shutter speed is used to show the water blurred
Here in this genre of photography is the most important to keep the ISO low, preferably ISO100 or lower. Why? For two reasons, the first is here the dynamic range is the widest (the camera ability to capture bright and dark details on the same picture, which is most important at landscapes), and here is the best the overall picture quality. If there is not enough light, a tripod or some support is a must. If you don’t have a tripod, you can increase the ISO up to 400 or 800 in extreme cases usually without much image quality problem.
The iso 3200 setting is too much, image quality is degraded
Macro

For macro many people use tripod so the shutter speed determined by the subjects speed. If the subject stands still, not needed very high shutter speed, but sometimes it is in the shade which requires higher ISO settings.
Night
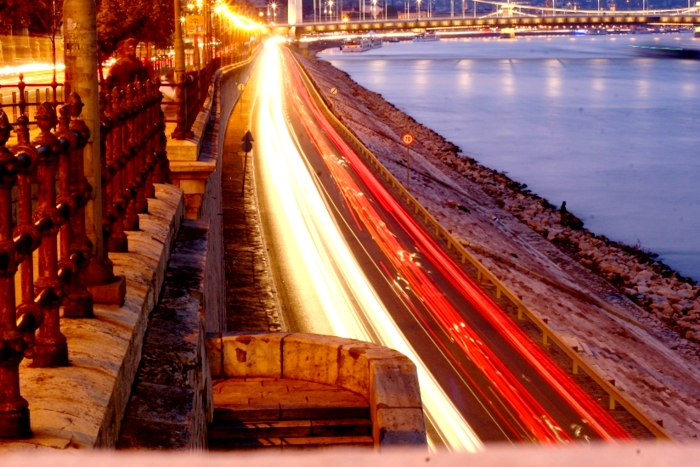
The low ISO settings and long shutter speeds (several seconds) allows the vehicles to draw interesting lines on the picture. For this picture I placed the camera on the existing concrete structure.
At night I prefer to use low iso settings with a tripod. At dark situations the pictures at higher settings are much uglier. The low settings here gives an exposure times of several seconds or ten seconds, see the picture above.
Portrait

For portraits we usually use bright prime lenses, which helps to use lower settings. Inside in badly lit conditions do not hesitate to increase the ISO or use a flash.
Wildlife
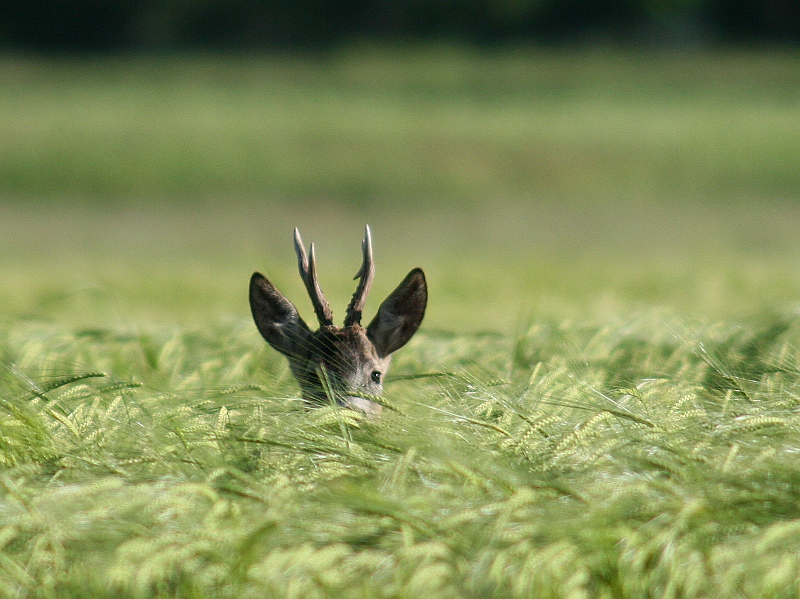
For wildlife like sports high shutter speeds need, to freeze action. No chance must increase ISO or get brighter sharper lenses. Typical consumer grade telephoto lenses are not sharp at f/5.6 aperture. Needs to use at f/8 to makes sharp shots, meaning you need more light or higher iso for the same shutter speed in order to make a sharp shot and freeze action. If we photograph a still subject for example bird on a tree, we can use tripod and can work with lower shutter speeds, which translates to lower iso settings.
Sports
For sports photography usually higher shutter speeds(1/500s or higher) preferred to freeze action. A tripod is not helps in freezing action. For this we must increase ISO usually, if we don’t have sharp bright lenses, or have not so bright lighting situations.
The smaller the number, usually ISO 80,100,200, the better picture quality picture we can get, usually the smallest number ISO gives the best picture quality. The two below pictures was made at high ISO settings of 3200 and 1600 on a Canon 30D camera. Note that Dslr cameras make very good quality images in even high iso sensitivity settings. The ISO is more apparent in the darker parts of the images. Red dots, patterns and blobs can be seen especially if we see the photo in bigger size. If we see the closest parts of the cup, the below photo is much cleaner because it was made at lower ISO sensitity (1600 vs 3200). The 3200 setting is where most non-full frame Dslr camera starts to suffer. Newer cameras are usually better. Some of them can produce quite usable quality at ISO 6400 setting.
ISO stands for two meanings. One for photography described below, other is used in standardization and industrial processes, which I don’t discuss here.
Intro
The iso is the most frequently changed setting on a Dslr camera. If you use a compact camera read about iso on a bottom of the page.
The usual ISO values are the following:
ISO 100, 200, 400, 800, 1600, 3200, 6400, 12 800, 25 600, 51,200, 102,400, 204,800, 409,600. Today (2015) most cameras won’t go further then ISO 25,600. Older cameras stops at ISO 1600 or 3200 values. ISO 50 also occur in higher end cameras. If we double the ISO value (for example from 100 to 200 or from 800 to 1600, etc), we double the shutter speed as well, which helps to avoid blurred images, or make sharp images even sharper.
ISO
With ISO settings we must follow the available light levels in photography, if we don’t use a tripod or other support. In dark situations we use high ISO values (800-6400), in bright situation low ISO values (100-200). In the middle we use middle values (200-800). What if we don’t do that? If we use low iso values in dark situations we end up blurred images, unless we use a tripod or other solid support. The tripod support or stabilizer only helps with still subjects, for moving subjects we need higher shutter speeds. If we use high ISO values in bright sunlight we got too high shutter speeds (this not a real problem) and because of the high ISO setting lower image quality (this is the real problem, we make a low quality photo), than with lower ISO settings.
If I want to give a very short explanation, I can define ISO as light sensitivity setting on the camera.
In old times there were different types of films, which is similar ASA 100,400, or 800.
Quick iso guide
When we use different iso settings, and what we can expect ?
ISO 100 |
bright sunlight, short(wide) lenses in good light, landscapes on a tripod |
ISO 200 |
bright sunlight, short(wide) lenses in good light, landscapes on a tripod, we have double shutter speed in good quality |
400 |
not so bright situation, longer lenses in good light, perhaps the most usable setting, if we don’t want to change settings all the time |
800 |
outside in darker situations, longer lenses in overcast weather, noise starts to appear |
1600 |
in a room, darker situations, when high shutter speed is needed |
3200, 6400 |
in darker situations inside the room, or at night |
12 800, 25,600, 51,200 102,400 |
In very dark, the lowest quality, usually artifacts, noise quite strong, a good idea to switch to BW |
[do_widget Text]


The smallest iso setting we can call base iso. At this level the light sensitivity of the sensor is the smallest, this means the base iso we can only use in bright sunlight.
If we want to make sharp pictures in darker situation we must increase the ISO. Below I make some guideline:
For understanding how to choose ISO, first we must understand what shutter speed and aperture is.
[do_widget Text]
Shutter speed:
is how quick the camera make the picture. For example in good sunlight the camera makes the picture at 1/500s shutter speed, but in darker environment just 1/30s shutter speed. In really dark situations we cannot make sharp pictures because the image going to be blurred, because of too low shutter speed of 1/10s, 1/3s or even slower shutter speed, meaning 1s, 2s or more. This is where the iso comes in: if our camera set to iso 100 – we have a shutter speed of 1/2s which results a blurred image. If we set the iso to 200 our shutter speed doubles going to be 1/4s, if we set the iso to 400 the shutter speed going to be 1/8s. In case of value 800 going to be 1/15s and 1600 setting we have 1/30s, perhaps here the image not going to be blurred here. Other possibility to increase shutter speed to use brighter lenses or use the lenses at their brightest aperture(smaller number). Different minimal shutter speed needed for wide angle lenses and for telephotos. The rule of thumbs is 1/focal length is the shutter speed required for Full frame cameras, 1/1.6*focal length at Aps-C cameras. Meaning with a 18-55mm lens a shutter speed of 1/18-1/55s needed at least for a sharp photo at Full frame camera, 1/24-1/80s for an Aps-C camera. With a 400mm focal length 1/400s, and 1/640 sec
needed respectibly. In reality this rule is not hundred percent usable, but can be used as a starting point. I would say for a 400mm lens a shutter speed of 1/1000s required, for critically sharp shots, and for wide angles I prefer at least 1/200s for sharp images. Below pictures shows that the 1/400s shutter speed allows to take a sharp picture with a 280mm lens. Lower shutter speeds resulting blurred images for the 280mm lens.

ISO 100 – 1/30s 280mm

ISO 200 – 1/60s 280mm
ISO400 – 1/125s 280mm
Aperture
is the whole on the lens where the light comes through. In case of digital reflex cameras we see through the lens when we compose the picture and the lens only at the moment of shutter release makes the whole of the lens smaller, where the light comes through. If we check the lens from the object side we can see this how is it happen. Aperture is usually noted by a number which can be seen on the lens. For example 100mm f2.8 macro. The f2.8 refer to the lens’s biggest (widest aperture), the smaller the number the whole where the light comes to the camera’s sensor is smaller. For example f11 is quite a small hole where the light comes in. If we set an aperture at f2.8 at the given lens and the shutter speed is still not enough to make a sharp picture, we have no other choice than to increase iso sensitivity. If we use telephoto lenses and want to make a picture of distant things we use the sharpest aperture is usually f5.6 in good quality lenses f8 at cheaper or zoom lenses.
The problem with iso that it decreases image quality. The degradation is the following: sharpness and contrast is decreases, less detail we can find, sometimes red dots appear. For example a usual compact camera cannot make nice pictures above iso 400, a good DSLR camera (newest Canon 70d, Nikon d7100, d5200, Fullframe cameras) can make usable images at even in iso 6400 (better images than the compact camera at iso 400).
The worst combination when we use long telephoto in low light situation. This can mean 400mm lens with 1/1000s, we must use iso 1600,3200 or put the camera on a tripod, which can help at certain amount, but this is not always possible.
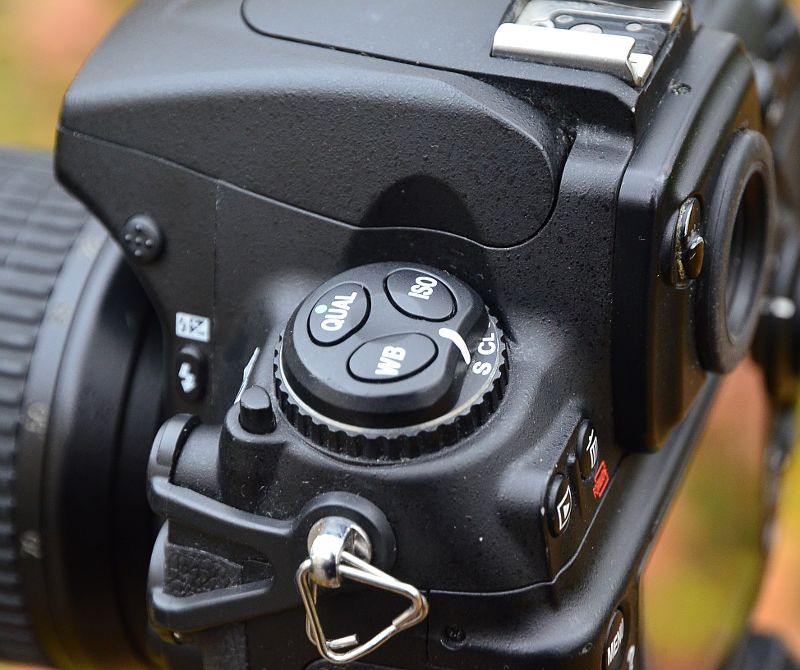
How to adjust ISO
Most DSRL cameras has a dedicated ISO button. If not it can be found in the menu. Usually must push the button and turn one of the dials or the only dial afterwards. On certain Nikon dslr cameras must push info button after we can adjust the setting on the rear screen. We can check on the screen which iso is selected. Some compact cameras doesn’t let the user adjust the iso setting, the camera does it automatically. Many cameras has auto iso setting, but it is not always works as a user prefers, because the camera always wants to use the possible lowest setting, which cannot help if we want to freeze action, For example I shoot a wedding with a Canon 550d camera, and I used auto iso. The camera almost always used iso 100 setting, with a relatively slow iso setting, which resulted in 30 percent blurred images. If I would set the iso at 200 or 400 none of the pictures would be blurred, and the picture quality is still excellent at iso 400. Other thing that happens the in auto setting a camera doesn’t come over certain iso settings, stuck at 400 for example which is useless in a dark room for example. General rule to keep the number low as it is possible, but high enough that we can make sharp pictures. This is way a good bright lenses are very valueable, we can make good quality pictures even in lower light situations.
Higher settings
There is usually higher settings on some cameras mark with H letter. For example on my Nikon d7000, there is H03(8000),H07(10,000),H1(12,800) and H2 settings.(25,600). When we made a picture we usually can check on a computer the ISO settings the picture made. This H settings is sometimes cannot be checked on the computer.
ISO anomalies
ISO Normally is an absolute unit, like weight, force etc. In some cases we can experience not logical things. For example earlier Canon Dslr cameras has 25% more ISO sensitivity as noted. What does it mean? At lSO 100 setting the camera in reality in lSO 125, this way the shutter speed is higher.
Nowadays usually the opposite is true, the cameras usually has less sensitivity as noted (the pictures look better than the reality). For example you set the camera at ISO 3200, but in reality you use ISO 2758 just the say a number. DXo lab makes such measurements when they compare the camera ISO to the measured realistic number. According to graphs can happen you use ISO 600 in reality instead of ISO 800, or ISO 4800 instead of ISO 6400.
If we check this measurements we can found that ISO 50 is in reality also ISO 100, because it is the cameras lowest sensitivity setting. (The camera has an ND filter in it it to lower the shutter speed or other method). In this case the camera just simulate the ISO 50 setting.
Sunny 16 rule
This rule is to calculate absolute numbers. It is used to calculate shutter speed. In bright sunny weather you need 1/lSO s at f/16 for sharp shots. What does it mean ? 1/100s f/16 at lSO 100, 1/400s at lSO 400, etc. This rule is not really good for telephoto lenses. If your subject is in a shade you need higher sensitivity, if it is on the sun lower. What matters is the light conditions of area the lens covers.
Difference between cameras
The camera with bigger sensors called Full frame cameras are better in higher iso sensitivities, than crop sensor cameras. But today even entry level Dslr offerings has very good high iso performance up to ISO 1600 or 3200. The difference between true compact and Dslr cameras are huge. The Dslr cameras can produce much better cleaner images than compact cameras. The difference between manufacturers are not huge. Currently Nikon is the best in this regard.
ISO on compact camerasMost simpler compact cameras select iso automatically, and doesn’t let the user to adjust is manually. Some other cameras let the user adjust iso, but sometimes it is complicated, and takes lots of time, as it is in the menu. Few compact cameras has a dedicated iso button, which allows to adjust iso quickly. If you can adjust iso on your camera, first needs to understand how your camera handle different iso settings. Most compact cameras here is the weakest against Dslr cameras, as only the basic settings of 100, or 200 really usable, why several Dslr usable up to 6400 setting. In dark environments usually the output is much worse than in brighter situation even for the same settings. ISO on MILC cameras
|
ISO tricks
Underexposing
There are some tricks regarding ISO. First is underexposing the image, using exposure compensation , in some cases it is possible to underexpose even 5 stops. It means for example you use 200 setting underexposed by 5 stops it is in reality same as you make a picture at 6400 iso. The pic you made will be dark, must use Raw (NEF) and after in post processing push back to the normal level. Sometimes just little underexposing needed, like -1/3 or -2/3 stops, to use a much better setting and correct the pic after in post. Must experiment before do this, how your camera perform in that regard. Nikons are usually better than Canons, according to my experience.
ND filters
In bright sunlight if we use bright lenses for shallow depth of field (f/1.2 f/2.8), we can face the following problem: the shutter speed can be higher than the camera max shutter speed (1/4000 or 1/8000s) even at the base iso. Here we need ND filters (natural density or simple grey filters) to diminish light quantity to the sensor.
Flash
Inside the room flash can help to keep iso lower. Most cameras we can control the flash power. I often dial back the flash power a bit to have more natural results. In some cases, for example at bright sunlight or if we use high iso setting, we can have problems with the flash. The problems occuring because the flash usually only synchronize up to 1/250 or 1/320s. In bright sunlight for this small aperture is needed, which is not preferred for example at portraits. If we use high iso settings it can occur that the flash will be too strong. (Must turn the iso to lower settings).
Long exposure
If we use a tripod, we can make interesting pictures of running water. For this low iso setting, small aperture (f/11-f/22) is needed. Even help to turn the camera downwards. The water looks differently at any different shutter speeds. ND filters also can help to use longer shutter speeds like several seconds or minutes.
Assignment
Learn ISO setting of your Dslr camera, and make pictures at different ISO sensitivites of 100, 200, 400, 800, 1600, 3200 and any other your camera has. Find the quickest way how you can change iso settings. Some cameras has a dedicated iso button, some hasn’t. In some cases you can assign to other buttons. Study the results what you get. Try to get the appropriate setting for different light situations.