Changing hue in post-processing
Changing hue in post-processing
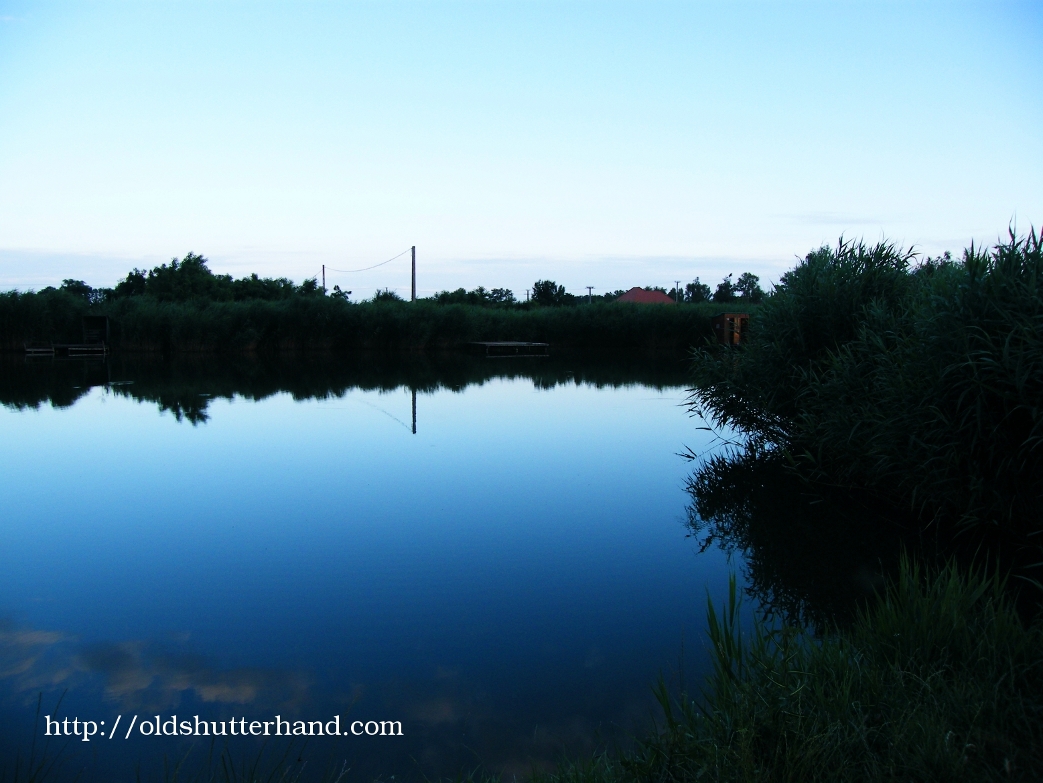
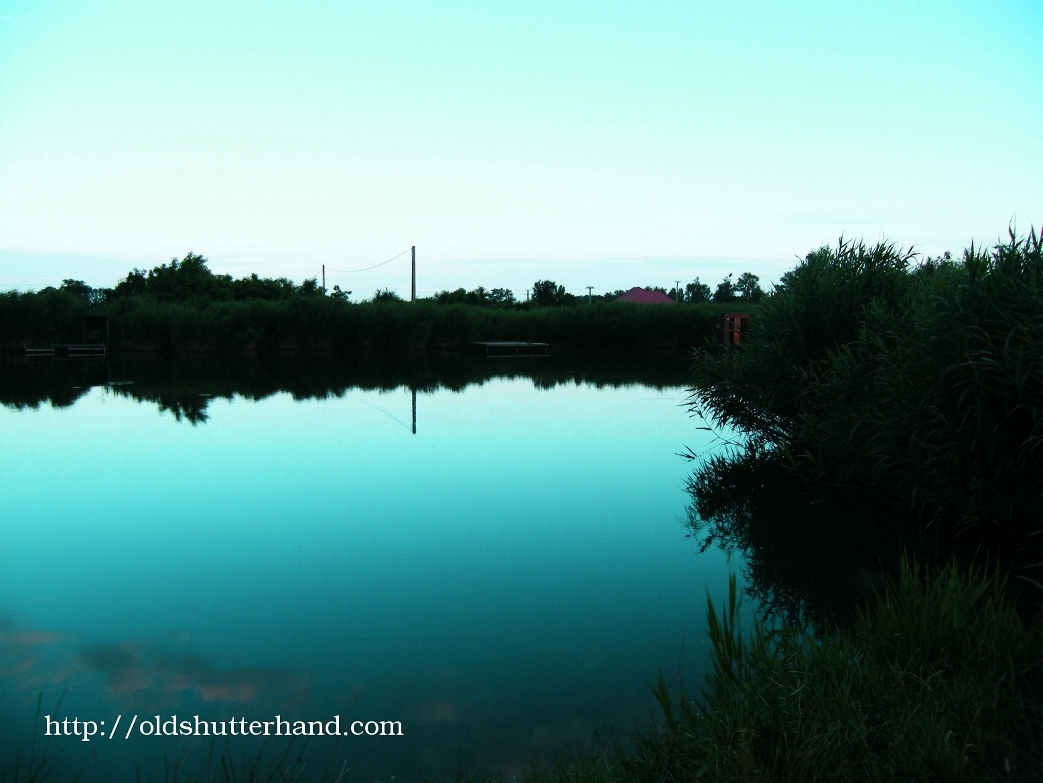
Blue lake the original picture – in reality it is not an untouched photo. First in-camera I have a picture profile when I add some contrast and saturation, after using curves try to make the sky darker, and add a little bit of saturation, but hue has not changed, the problem always the sky which is too bright, to overcome this Graduated density filters are one of the solution which makes the sky darker, or make multiple photos, one darker and combine the pictures afterwards.
If you wonder the most colorful pictures on one of the big internet photo share portrals (like Flickr, G+ or others), you may wonder at some photographs how such colors can come out of the camera ? Of course there are some colorful places on our planet, but I think many of the photographs are far from realistic.
What makes a photo ‘pop’ are the following things:
1. Boost contrast
2. Saturate colors
3. Sharpening
In different types of photographs the emphasis are different. If we want small detail of a bird sharpening is very useful, for landscapes colors and many cases contrast.
[do_widget Text]
The obvious thing to boost colors are changing the saturation which can be done in many software from Photoshop, Lightroom, the free Gimp, or many other software.
The other thing is hue, which change the color balance, starting from reddish to greenish or blueish. The pictures in this page are the same, only difference is hue which was controlled by Gimp software.
The hue can be found in Colors-Hue saturation in Gimp. There are three sliders, Hue, lightness and saturation the only thing I did change hue slider all over the range to produce the below photographs from the original.
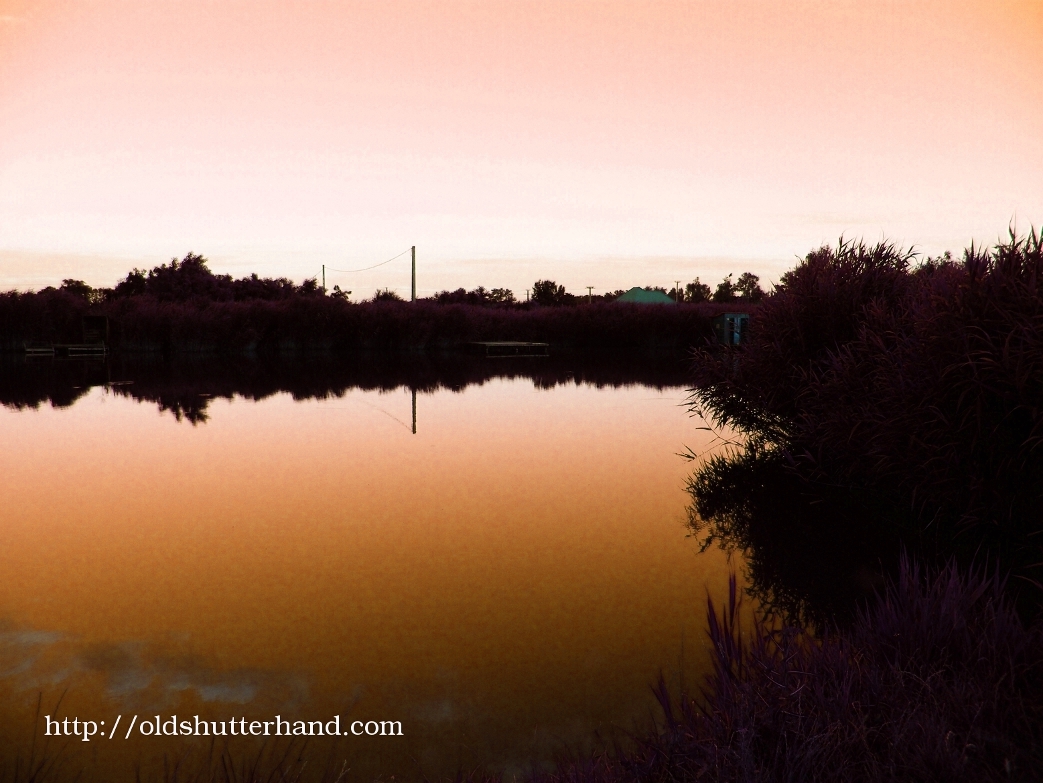
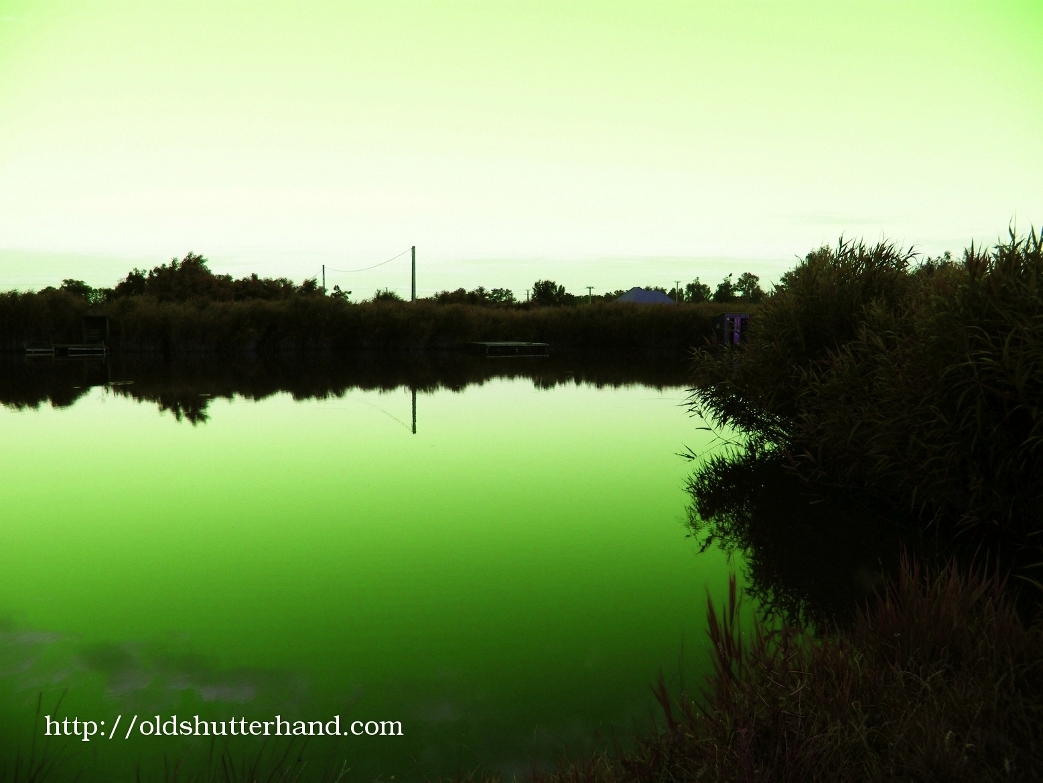
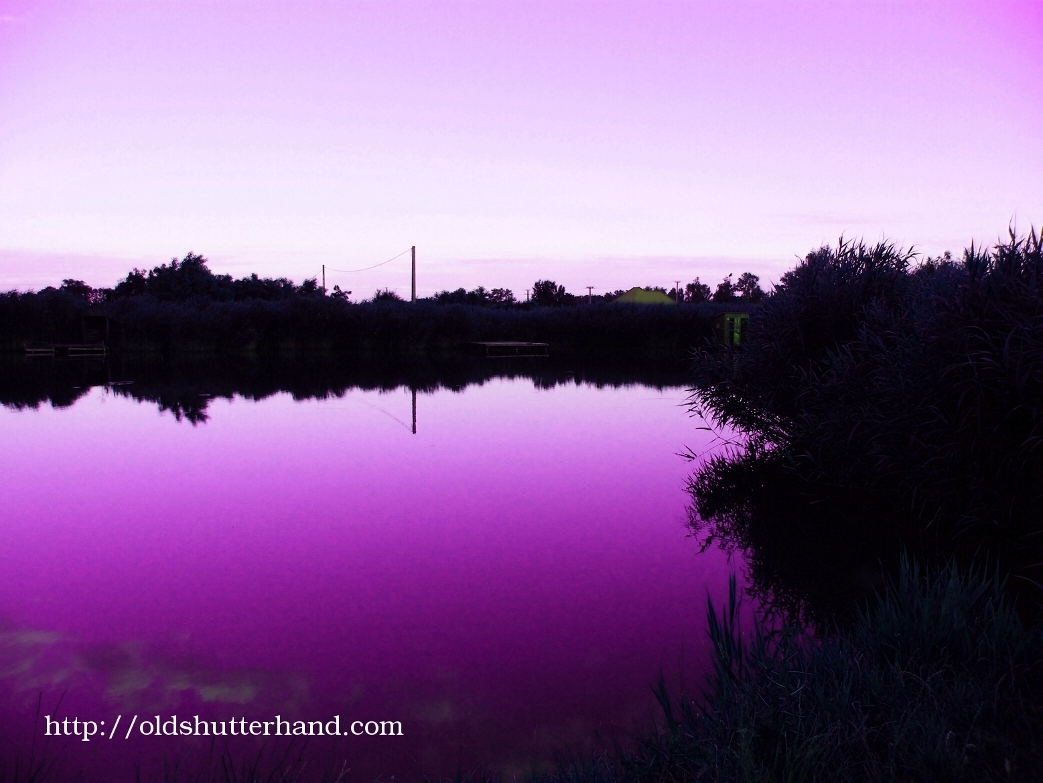

These pictures shows big changes but even small changes can make things interesting. In practical cases only a small change or no change required to tweak a photo a bit to have a small unique taste.